Improve Your Mobility With Spider Lunges

Spider Lunges: Step-by-Step Instructions
- Get into a high plank position with your hands directly under your shoulders, core braced, and your body forming a straight line from head to heels. This is your starting position.
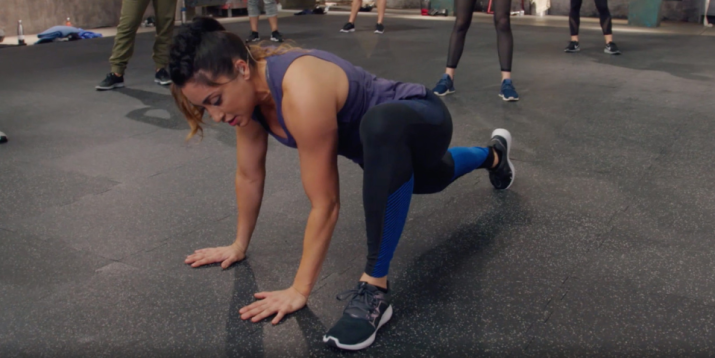
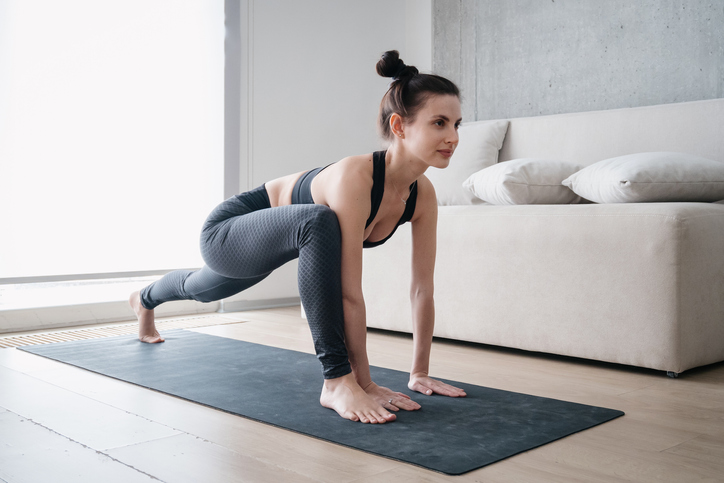
- Keeping your hips down, step your right foot forward and place it outside your right hand.
- Hold for a moment, and then return your right foot to the starting position.
- Repeat with your left foot, stepping it outside your left hand, and then returning to the plank position.
- Alternate sides until all reps are completed.
How to Make Spider Lunges Easier
If this exercise gives you too intense a stretch, or you aren’t able to get your foot all of the way forward to your hand, that’s OK! Modify the spider lunge by taking a smaller step forward. This allows you to focus on moving through a range of motion that’s comfortable for you.
How to Make Spider Lunges Harder
There are a couple of ways to make this exercise even more challenging. Try these variations to work your muscles even more:
- After stepping your right foot forward, lift your right arm toward the ceiling, opening your chest and twisting your torso. Hold. Repeat on the opposite side. This will allow you to get a greater hip stretch while also adding in some thoracic mobility.
- Speed up the movement. Instead of stepping back to plank in between sides, jump your feet to switch which foot is in front. You should still try to keep your hips low as you move. This variation will really turn up the core engagement.
Benefits of Spider Lunge

The spider lunge is, above all else, a mobility exercise. It targets the following muscles:
- Hip flexors at the front of the hips
- Hip adductor, or inner thigh muscles
- Glutes
It’s important to stretch these muscles, especially your hip flexors, which can get tight with everything from excessive sitting to cycling and running. “Most people have limited hip mobility, so the spider lunge is a great exercise to open up the hips,” says Braun.
Spider lunges also work your core, as you have to engage your abdominals to hold the high plank position. Your core is also used to stabilize your body as you move your foot forward and back.
How to Add Spider Lunges to Your Workout Routine
The time to do spider lunges depends on when you’re doing them in relation to other exercises, Braun says.
“If you hold this stretch for time, I would recommend performing the stretch after your workout,” he says. “If you move through this stretch by alternating legs with minimal holds, then I would suggest performing the spider lunge before your workout as a dynamic stretch.”
Of course, you can also perform it both ways — and even do it throughout the day to break up stints spent sitting.

Spider lunges might sound like some tricked-out maneuver that requires sprouting four extra limbs. Fortunately, it isn’t that complicated, and extra-fortunately, you don’t have to grow four more appendages.
In reality, the spider lunge is a next-level mobility exercise that can help to increase flexibility, warm up your lower body, and ease tension in your hips, explains Cody Braun, CPT.
And since you’re moving through a plank position, you’ll target your abs with this exercise, too. Hip mobility and core work, all in one? Sign us up!
Here’s everything you need to know about spider lunges to get their maximum benefits.