How to Do the Stability Ball Rollout With Perfect Form

Like the muscle-up, the pistol squat, or the one-arm pushup, the ab-wheel rollout is a “bragging rights” move — as much a movement you perform to demonstrate your fitness as it is an exercise to build muscle.
There was a time when there was no good way to work up to the full rollout on an ab-wheel — a kind of pushup-pullover-plank hybrid — but now there’s an easy remedy: the stability-ball rollout.
Stability-ball rollouts work the abdominal muscles in exactly the same way as their tougher cousin, but the movement is easier on your core and more accessible to the average gym-goer.
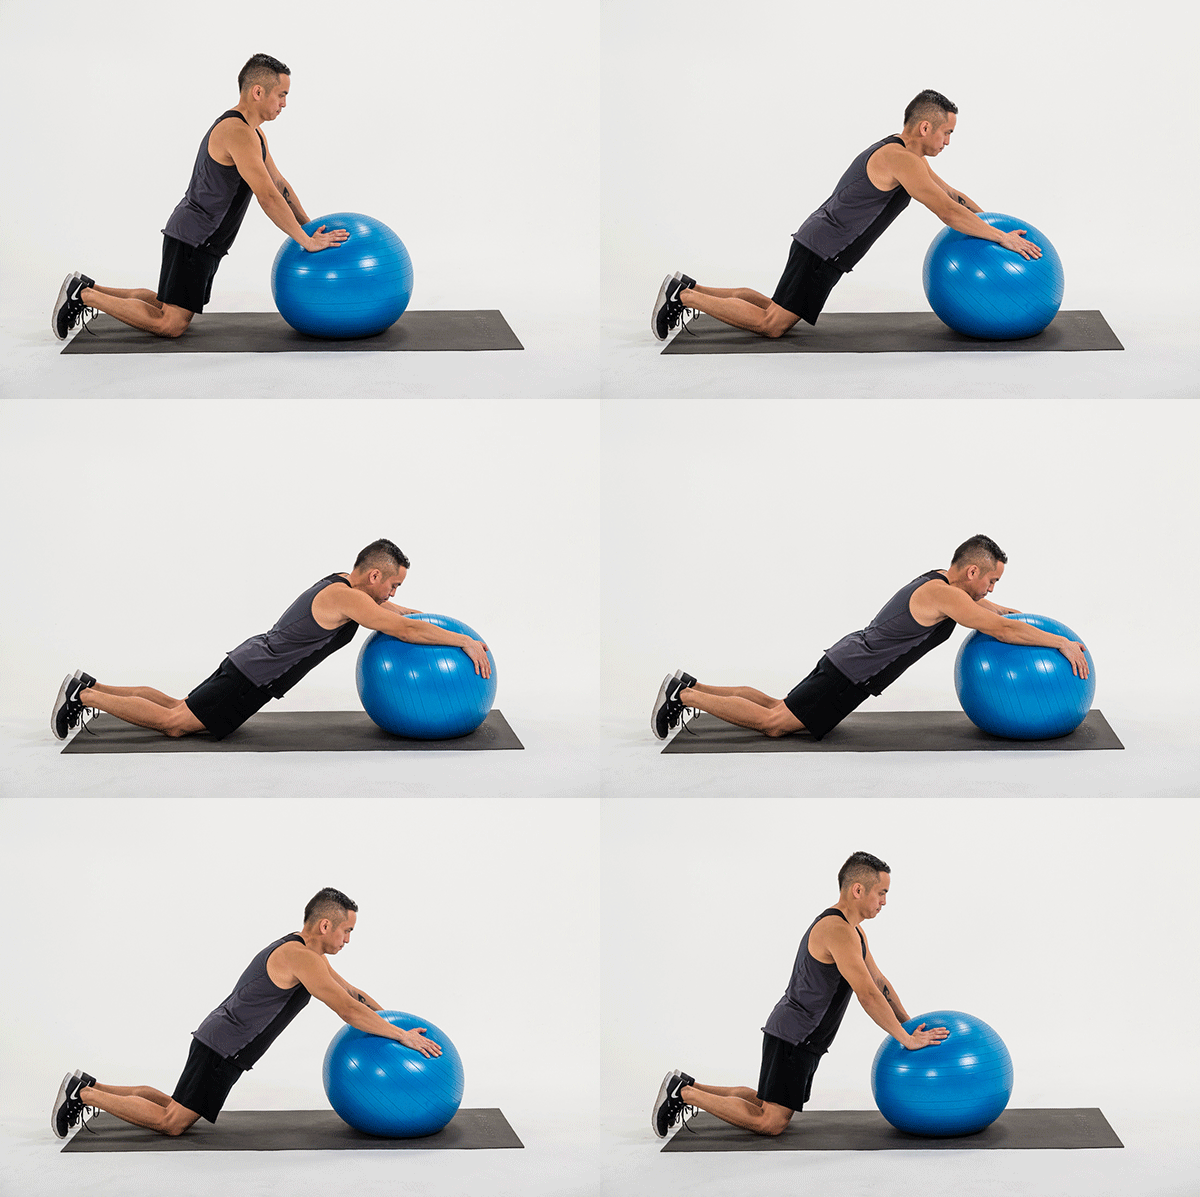
It looks pretty straightforward: kneel, put your arms on the ball, and roll the ball forward like you’re flattening dough on the gym floor.
But doing it properly takes some focus and skill. Here’s how.
Stability Ball Rollout: Step-by-Step Instructions

- Choose a ball: Go bigger (up to a 33-inch diameter ball) if you’re just learning the move, smaller (18-inch diameter) once you’ve had more practice.
- Kneel behind the ball, fold at the waist, and place your forearms on top of the ball, palms down.
- Tighten your abdomen and keep your back flat. Maintain that position throughout the movement. The moment you feel your lower back arch, stop the set.
- Lean your weight onto the ball and slowly extend your arms in front of you, rolling the ball forward as far as you can while maintaining the same position in your lower back.
- Pause 2 to 3 seconds in the fully extended position.
- Reverse the movement, slowly returning to the starting position.
- For a workout, repeat two sets of 8 to 12 reps.
How to Make It Easier
If you have difficulty keeping your lower back flat— even with the largest-sized ball — then try these two modifications to make it a little easier:
- Hold it. Brace your forearms on the ball as described above, tighten your belly, and hold for 10 to 40 seconds, for two to five sets.
- Work small. Once you can hold the basic position for 30 seconds or more, practice moving the ball just a few inches forward, holding the most extended position you can achieve (which may only be an inch or two forward of the starting position) for sets of 10 to 40 seconds. Over time, work your way up to the full version.
How to Make It Harder
- Go small-ball. The smaller the ball, the greater the weight you have to stabilize with your core — and the tougher the movement.
- Push the range. Start with your hands further away from you at the top of the movement. The further forward you roll the ball, the more difficult it will be.
- Slow Down. Once you’ve reached your most extended point, pause for a five-count. The movement gets exponentially harder the slower you go.
- Stand at attention. This is the toughest variation of all: Perform the move on the balls of your feet instead of your knees. Your first few times out, work with the biggest ball available — and keep your movements small. This one’s a toughie.
Stability Ball Rollout Variations

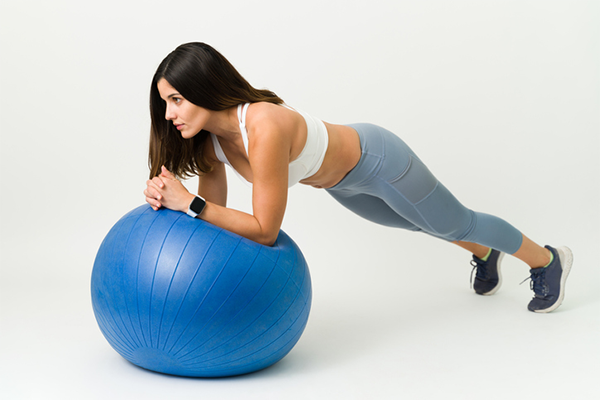
- Stir the pot. Assume a plank position with your forearms on the ball and circle your elbows slowly — clockwise, then counterclockwise (that’s one rep). The slower you move, and the bigger the circles you make, the harder it is — aim to spend at least 10 seconds on each rep.
- Use a suspension trainer: Instead of placing your hands on a ball, hold the straps of a TRX or equivalent. From the pushup position, slowly extend your arms forward into the “flying superhero” position. Make it harder by lengthening the straps or walking your feet backward; make it easier by shortening the straps or walking your feet forward.
- Use the ab-wheel: Mastered everything up to this point? Try using the ab-wheel: from a kneeling position, hold the handles of the wheel, lock out your arms, and roll the wheel along the floor as far forwards as you can and back. Don’t be discouraged if you don’t get very far at first.
Muscles Worked in the Stability Ball Rollout

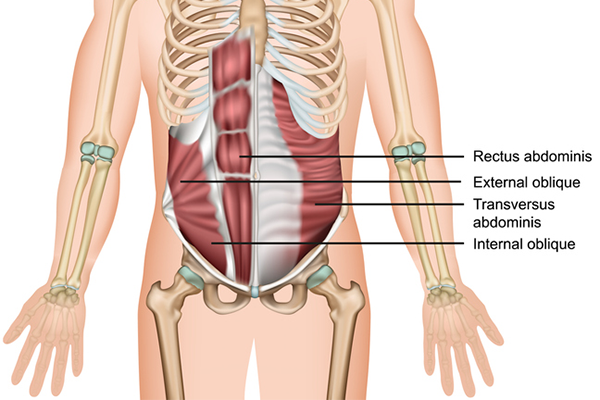
Though you might feel it in your arms and shoulders, the stability ball rollout is primarily a core exercise, with the emphasis on the rectus abdominus, or six-pack muscle.
These muscles’ primary function is to resist extension — or keep your lower back from arching excessively.
Also involved in the movement are your latissimus dorsi — the large muscles on the sides of your back that pull your arms down from an overhead position, the transverse abdominis, and the intercostals, which prevent the ribs from flaring outwards.
